


DIY ultrasonic cleaner, how to make ultrasonic cleaning machine with Granbosonic DIY ultrasonic parts
Browse Volume:4142 Classify:Support
When the ultrasonic cleaning machine used by some users with strong hands-on ability fails, it is often not sent back to the manufacturer for maintenance, but repaired by itself. When installing the ultrasonic cleaning machine, there are many problems that need to be paid attention to. If there are problems in the installation, the instrument will not work normally. Today, we will mainly introduce some installation and operation procedures for ultrasonic cleaning machines, hoping to help users better apply products.
Installation steps of ultrasonic cleaning machine:
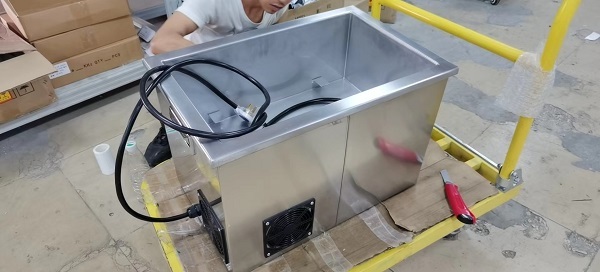
Assemble ultrasonic cleaning machine
1. Prepare
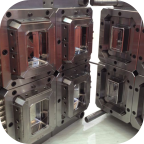
Prepare the required adhesive ultrasonic transducer (properly equipped), cylinder block, mesh pad, glue, etc.
2. Sandblasting
Stop sandblasting the ultrasonic transducer and cylinder block required to be bonded. The bonded surface of sandblasting shall be as rough as possible. 30 mesh diamond sand shall be used for sandblasting. The sand must be dry and often selected (it shall be selected every time when it is put into the sandbox). The pressure of compressed air during sandblasting shall be ≥ 6kg and the high-pressure air dehumidified by the air source processor.
3. Cleaning
Stop cleaning the cylinder block and ultrasonic transducer disposed of by the ultrasonic cleaning machine. Stop cleaning the transducer with methanol first, remove the dust such as sand on the surface, and then stop rinsing with acetone; The cylinder block shall be flushed with water first, then rinsed and cleaned after pickling, and then rinsed with methanol and acetone after cooling and drying. The mesh pad shall be cleaned with stainless steel mesh ≤ 30 mesh and thickness ≤ 0.15 (electrolytic disposal if possible) for standby.
DIY ultrasonic cleaner
4. Drying and preheating
Put the cleaned ultrasonic transducer, cylinder block, and mesh pad into the oven and stop drying. The drying temperature is 60 ℃ – 80 ℃. After drying for 2 hours, stop bonding when it cools to about 40 ℃. After all bonding preparation tasks are completed, prepare glue (normal temperature) and stop bonding quickly after full harmony.
5. Bonding
a. Put the disposed cylinder block on the bonding plate, and wipe it again with a cotton cloth at the bonding place with acetone.
b. Wipe the adhesive surface of the disposed of the ultrasonic transducer with acetone and cotton cloth again.
c. Preheat for 1-2 minutes after mixing the glue. (there should not be too much glue configured each time, subject to 20-30 glue joints at a time) the glue configuration is 5g / head, and the ratio is 1:0.4 (the adhesive is more accurate than the curing agent as far as possible).
d. Stop gluing when the cylinder block and ultrasonic transducer are cooled to about 40 ℃. During gluing, apply glue evenly on the cylinder block and ultrasonic transducer put a net cloth on both ends, and then press it hard. The gluing speed should be fast. After each glue is configured, the gluing day should not exceed 10 minutes (sufficient preparatory tasks are required).
e. Stop pressurizing after the glue is finished (it needs to record the tooling and soft press with spring).
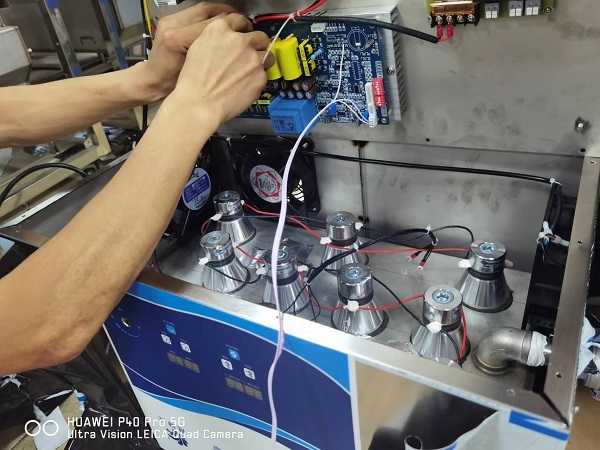
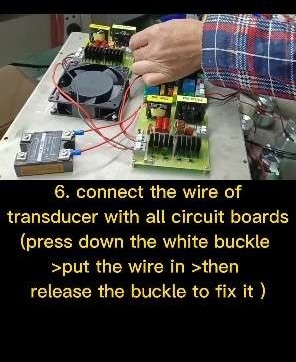
Bonding Of Ultrasonic Transducers And Circuit Boards
6. Solidify
Put the glued cylinder block into a dust-free oven to stop curing. The curing temperature is heated to 40-50 ℃ for 30 minutes, heated to 60-70 ℃ for 30 minutes, heated to 80 ℃ three times, cured for 2 hours, naturally cured for 24 hours, and then tested the wiring. Curing heating is controlled by the program-controlled intelligent temperature controller.
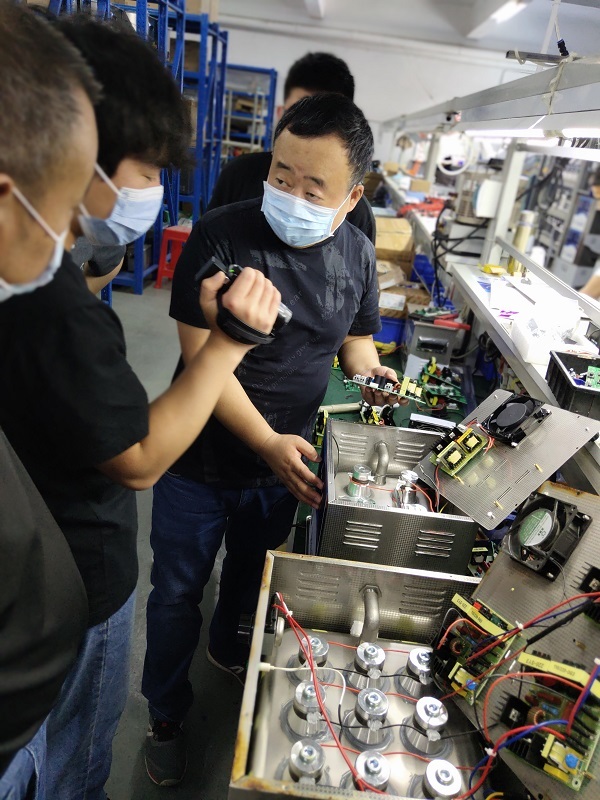
7. Detection
Stop testing the cured ultrasonic transducers. The bonding impedance of each transducer (60W, 22, 25, 28kHz) is about 250 Ω and cannot exceed 300 Ω. Stop testing the characteristics of the energy converter (no clutter). The impedance value of the ultrasonic transducer on the same cylinder block should be close to the difference as as possible and cannot exceed 20% (about ± 50 Ω) of the uniform value. Remove and re-bond the ultrasonic transducer that does not meet the requirements.
Only when the ultrasonic cleaning machine is reasonably installed can it operate normally, which will not bring the advantages of the work of some ultrasonic cleaning machines.
Tank Cleaning
Tips:
How to avoid the transducer degumming problem of the ultrasonic cleaning machine?
The cleaning agent and water of the industrial ultrasonic cleaning machine can even be heated to more than 100 ℃, but it is easy to degum the transducer. So avoid excessive temperature
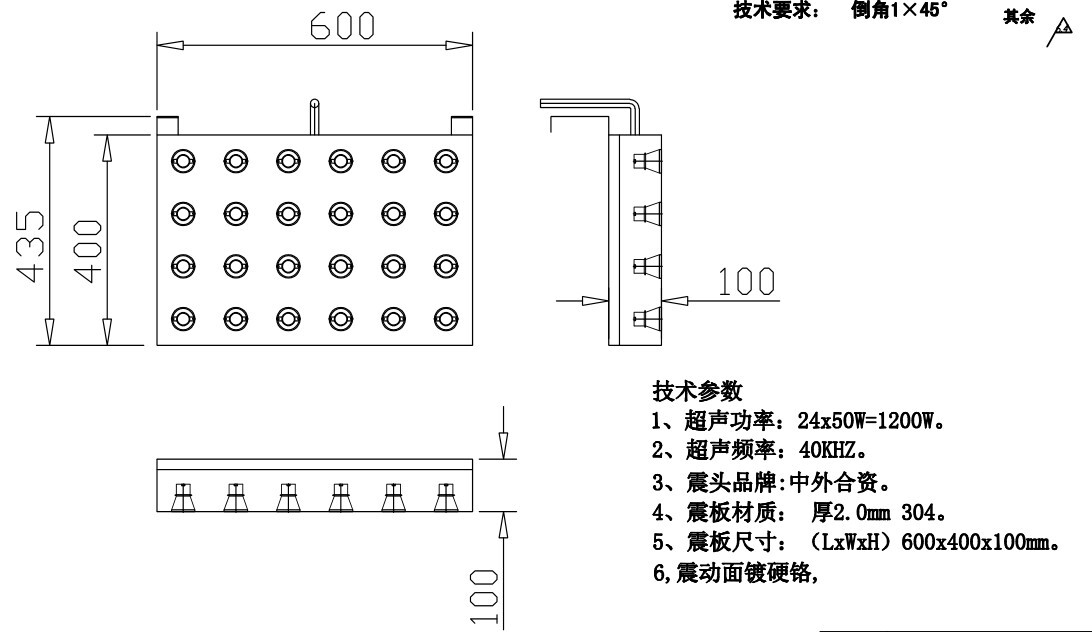
Ultrasonic cleaner assembly diagram


Hello!