


Keeping Dental Ultrasonic Cleaners Truly Clean
Browse Volume:174 Classify:Support
In every dental clinic, precision is everything. From the exact placement of an implant to the routine sterilization of instruments, there’s no room for error. And among the many tools working behind the scenes, the ultrasonic cleaning system is one of the quietest heroes. It hums away in the background, removing debris, blood, and contaminants from dental tools with microscopic accuracy. But here’s a rarely asked question: who cleans the cleaner?
You’d be surprised how many clinics unknowingly put their trust in a system that hasn’t been properly maintained. When an ultrasonic cleaner is used daily—sometimes for dozens of cycles—it’s not just the instruments that collect residues. The tank, transducers, filters, and solution reservoirs all become silent hosts to organic buildup. Left uncleaned, the device that’s supposed to support sterilization can slowly undermine it.
To maintain not only performance but also hygiene standards, it’s essential to learn how to clean your ultrasonic system the right way. And in a dental setting, where infection control is paramount, the bar is higher.
Why Dental Settings Demand Stricter Ultrasonic Maintenance
Dental instruments are different. They don’t just come into contact with debris or oil like in industrial settings—they touch blood, saliva, plaque, and sometimes even tissue fragments. That’s why ultrasonic cleaning is only one part of a multi-step decontamination process that leads up to sterilization in an autoclave. But if the ultrasonic cleaner is dirty to begin with, every instrument that goes through it carries unseen risks forward into the chain.
Mechanical cleaning of instruments is a vital first step in decontamination—but only when the cleaning system itself is regularly disinfected and inspected. In practice, this means ultrasonic cleaners in dental clinics need to be cleaned daily, not just when “something looks dirty.”

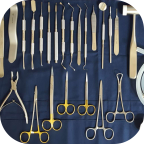
Dental Instruments
Daily Cleaning Rituals That Should Never Be Skipped
Start with the basics. Always unplug the device before any maintenance, and ensure that the cleaning solution has fully cooled before handling. Once safe, drain the tank completely and discard the used cleaning fluid—never reuse it, even if it looks clean. Dental contaminants are often microscopic and can still be infectious.
Use a lint-free cloth or sponge soaked in a neutral pH detergent to wipe down the interior of the tank. Pay attention to the corners and seams, where biofilm can silently build up. Rinse with distilled water and dry with a sterile cloth. If your unit has a basket or tray, remove and scrub it separately.
For internal tubing or overflow outlets, flush with clean water to prevent microbial growth. And don’t forget the lid—many overlook it, but it often catches splashback from the cleaning bath.
Once a week, run a cycle with a non-foaming enzymatic detergent specifically designed for ultrasonic machines. This helps break down any proteinaceous deposits and keeps the transducers in optimal condition.
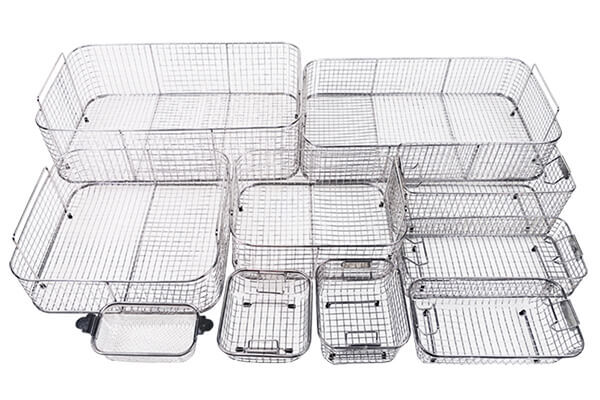
Baskets
What Cleaning Agents Are Dental-Approved—and What to Avoid
Dental ultrasonic tanks are generally made of corrosion-resistant stainless steel, but that doesn’t mean every cleaner is fair game. Bleach, phenol-based agents, or abrasive powders should be strictly avoided—they can not only damage the tank but also leave residues that interfere with future cleaning cycles.
Instead, choose enzymatic detergents or neutral-pH, low-foaming solutions labeled for medical or dental use. These are formulated to break down proteins and organic matter while being safe on instruments and equipment. After using any cleaning agent, always rinse thoroughly with distilled or deionized water.
For disinfecting the ultrasonic cleaner itself—not just the tools—use a medical-grade surface disinfectant approved for dental equipment. Make sure it’s compatible with stainless steel and always follow contact time instructions from the manufacturer.
How Often Should You Clean a Dental Ultrasonic Cleaner?
In a high-traffic dental practice, your ultrasonic cleaner is likely used several times a day. As a rule of thumb, the tank should be drained and cleaned daily. Internal parts like trays, filters, and drains should be disinfected multiple times per week, especially if visible residues are present.
Routine deep-cleaning cycles using enzymatic solutions should happen weekly. If your machine has a filtration system, inspect and replace the filters according to manufacturer guidelines—usually every one to two weeks.
And don’t wait for visible issues. A cleaner that smells off, produces weaker cavitation, or leaves debris behind isn’t just inefficient—it’s a red flag. Schedule preventative maintenance monthly, and perform a full inspection each quarter.

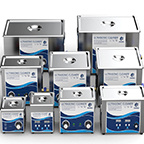
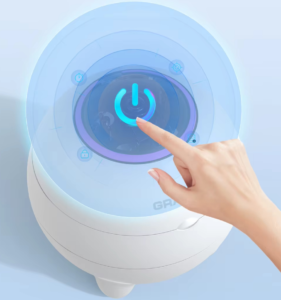
Granboultrasonic dental ultrasonic cleaning machine
When Professional Maintenance Is the Right Call
Even the best-maintained ultrasonic systems benefit from a professional touch once in a while. Especially in dental clinics, where compliance with sterilization protocols is closely monitored, it’s smart to schedule annual service for deep cleaning, calibration, and safety checks.
If your system uses modular tanks, filtration units, or built-in heating, those components may require additional care. Brand manufacturers like Granboultrasonic offer technical support and maintenance programs tailored for dental clinics, including anti-residue surface coatings and easy-drain tank designs that make cleaning faster and safer.
And if your current setup feels like a burden—perhaps it’s noisy, inconsistent, or difficult to maintain—it might be time to explore systems designed specifically for healthcare use. Features like self-draining tanks, internal rinse cycles, and antimicrobial surfaces are becoming the new standard in modern dental ultrasonic equipment.
Granboultrasonic dental ultrasonic cleaning machine


