


Choosing the Right Solution for Your Ultrasonic Cleaner
Browse Volume:158 Classify:Support
There’s something quietly satisfying about watching years of grime vanish from a delicate piece of metal or a cloudy pair of glasses with nothing more than sound waves and the right liquid. Ultrasonic cleaners have become a go-to method for restoring everything from jewelry to surgical tools, thanks to their precision and ease of use. But here’s the thing—while the machine is doing the heavy lifting, it’s the solution inside that’s the true workhorse. And choosing the wrong one? That can turn a promising clean into a damaging disaster.
When most people first encounter ultrasonic cleaning, they marvel at how effortless it seems. Just drop in the item, hit a button, and moments later it’s sparkling like new. But beneath the surface—quite literally—there’s science at play. The cleaning liquid isn’t just a passive bath; it’s an active agent that interacts with ultrasonic cavitation to reach tiny crevices and break down residues that brushes or cloths can’t touch. This is why understanding what solution to use in your ultrasonic cleaner is every bit as important as owning the device in the first place.

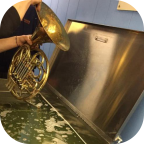
ultrasonic cleaner application
The short answer is that no, plain water isn’t enough. But the long answer is much more interesting—and useful. Depending on what you’re cleaning, the type of material involved, and the kind of contaminants you’re dealing with, the optimal solution changes. There’s no one-size-fits-all formula. You’ll want to consider factors like pH, solvent composition, biodegradability, foaming characteristics, and safety for both the item and the machine.
Understanding the Role of Liquids in Ultrasonic Cleaning
At its core, ultrasonic cleaning works by generating high-frequency sound waves that pass through a liquid medium, creating microscopic bubbles that rapidly collapse. This process, known as cavitation, produces localized bursts of energy that lift dirt, oils, oxidation, and other contaminants off the surface of the object being cleaned.
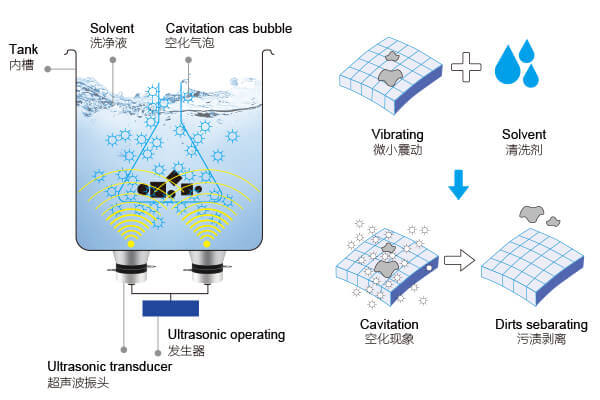
The Principle Behind Ultrasonic Cleaning
But cavitation is only part of the equation. The other half is the solution that transmits those sound waves. Without a properly formulated liquid, cavitation either won’t happen effectively or might not reach into all the micro-grooves and tight spots where contaminants like to hide.
Think of the solution as a performance enhancer—it makes the cavitation more effective, reduces surface tension, and chemically helps break down oils or biological residue. The liquid also serves to suspend dislodged particles, preventing them from redepositing onto the object.
This is why the choice of liquid isn’t just a technicality; it directly impacts cleaning efficiency, safety, and the lifespan of both your ultrasonic cleaner and the item you’re cleaning.
And yes, the wrong liquid can cause real problems. Using something too acidic might corrode metals. Using too many sudsy ingredients like dish soap can muffle ultrasonic waves. And using just water might do… almost nothing.
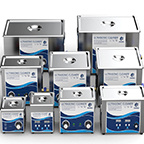
Ultrasonic Cleaning Agents
Common Liquids People Use in Ultrasonic Cleaners—and Their Consequences
Walk into any online forum or Reddit thread about ultrasonic cleaning, and you’ll see the same questions pop up: “Can I just use tap water?” “Is dish soap okay?” “What if I put in vinegar?” And every time, the answers vary wildly—because while technically you can use many household liquids, the outcomes range from surprisingly good to potentially damaging.
Let’s break down a few of the most commonly used liquids and what actually happens when you use them in an ultrasonic cleaner:
1. Tap Water (Alone)
Tap water seems like the most obvious choice—it’s cheap, convenient, and always on hand. But it’s also filled with dissolved minerals, which can affect cavitation intensity and may leave residues on delicate items like glass, lenses, or jewelry.
More importantly, water by itself is not a good degreaser. It lacks surfactants, which are critical for breaking down oils and lifting grime.
2. Distilled Water (Better)
Distilled water is a huge step up. Without dissolved minerals or chlorine, it’s gentler on both your items and the machine itself. However, it still lacks the active cleaning agents needed for most cleaning jobs. That’s why distilled water is often used as a base—not the entire solution. It’s the ideal canvas on which to mix more effective cleaning formulas.
3. Dish Soap (Tempting but Tricky)
A few drops of dish soap can improve cleaning power, especially for everyday household grime. But go overboard and you’ll introduce two major problems: excessive foaming, which interferes with ultrasonic wave propagation, and potential residue buildup on the ultrasonic tank and items.
Also, not all dish soaps are created equal—some contain moisturizers, fragrances, or even abrasives that are completely unsuitable for cleaning sensitive items like electronics or precious jewelry.
4. Vinegar and Other Acids (High Risk)
Vinegar is a popular DIY cleaner, but in ultrasonic cleaners it’s a double-edged sword. Acetic acid is strong enough to remove oxidation and grime, but it can also corrode metals, etch glass, and damage electronic components. Using vinegar on aluminum, brass, or plated jewelry can be catastrophic. Plus, the acidic fumes can be harmful if you’re cleaning in an enclosed space.
5. Alcohol (Evaporative and Dangerous)
Isopropyl alcohol is great for degreasing—but it’s flammable, evaporates quickly, and produces fumes that can ignite in the presence of heat or sparks. Most manufacturers strongly discourage using alcohol in ultrasonic machines without proper industrial safety controls.
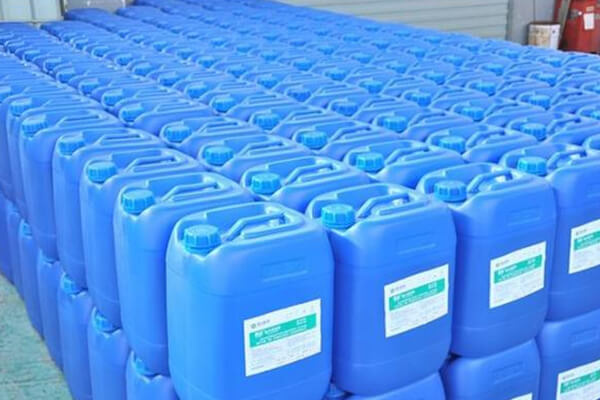
6. Specialized Ultrasonic Cleaning Solutions (Recommended)
These are designed specifically to work with ultrasonic frequencies. They often include surfactants, mild alkalines, corrosion inhibitors, and defoaming agents—basically, everything needed to maximize cleaning effectiveness while protecting the item and the machine.
Some are formulated for specific tasks:
- Enzyme-based solutions for biological debris (like dental tools)
- Ammonia-free formulas for delicate gemstones
- Alkaline degreasers for carburetors or engine parts
- pH-neutral detergents for sensitive electronics or eyeglasses
Cleaning With The Ultrasonic Cleaning Agent
Matching the Solution to the Item: A Case-by-Case Guide
The type of object you’re cleaning matters—immensely. Think of it like choosing skincare: you wouldn’t use a harsh exfoliant on a baby’s skin, nor would you use a delicate cleanser to remove engine grease. The same logic applies to ultrasonic cleaning. The solution you choose needs to complement the material and the type of contaminant you’re trying to remove.
Jewelry
For most fine jewelry—especially gold, platinum, and diamonds—a pH-neutral solution with no ammonia is best. Harsh chemicals can dull soft gemstones and erode metal settings. Professional jewelry cleaning formulas are specifically designed to lift skin oil, dust, and lotion residue without compromising stone integrity.
However, avoid using an ultrasonic cleaner for pieces with porous stones (like pearls, turquoise, opals, or emeralds). These materials are too delicate and can be fractured by cavitation forces, even with gentle solutions.
Eyeglasses and Lenses
Use a pH-neutral or mildly alkaline solution that contains no alcohol, acetone, or ammonia. Optical coatings are notoriously fragile—especially anti-reflective (AR) coatings—and using the wrong cleaner can lead to clouding or peeling over time. An ultrasonic bath combined with a gentle detergent is one of the best ways to remove smudges and skin oil from glasses without scratching the lenses.
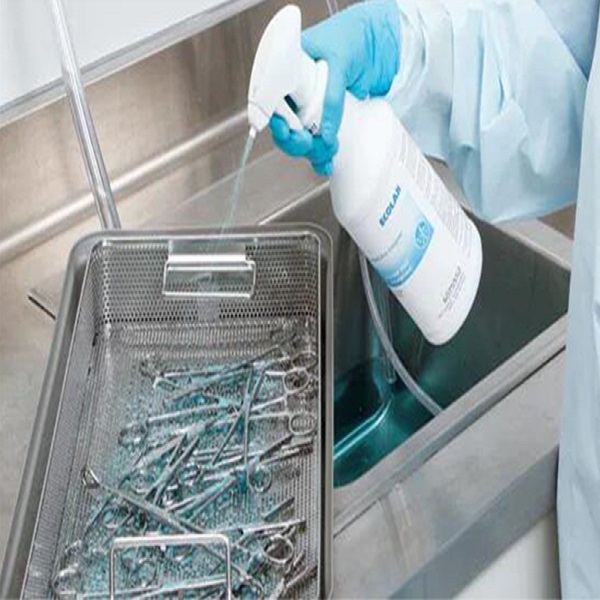
Dental Appliances
Retainers, dentures, mouth guards, and Invisalign trays benefit from enzyme-based solutions. These cleaners are formulated to break down organic matter like plaque, saliva proteins, and bacteria biofilm. The bonus? They’re usually non-toxic, fragrance-free, and safe for daily use. Many of them are recommended by dentists and orthodontists for long-term oral hygiene.
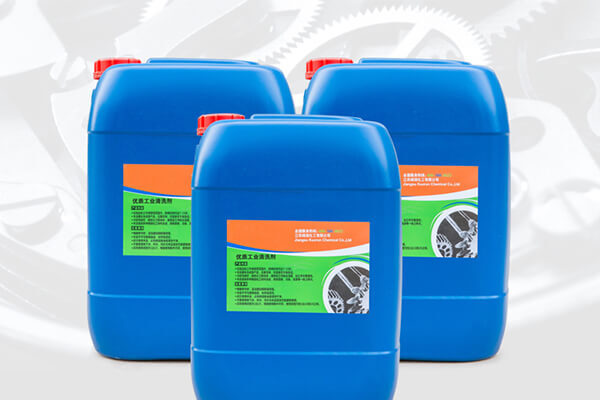
Metal Parts and Tools
If you’re cleaning engine components, carburetors, or surgical tools, go with an alkaline degreaser or enzymatic detergent. These solutions typically operate at higher temperatures (40–60°C) and are effective at emulsifying grease, oil, and grime. However, it’s important to ensure the solution is compatible with the specific metal alloy—especially when cleaning aluminum or magnesium, which are vulnerable to strong alkalis.
Electronics
For printed circuit boards (PCBs), connectors, and microchips, always use a non-conductive, residue-free cleaner. Some manufacturers recommend distilled water mixed with a small amount of a mild, electronics-safe surfactant. After cleaning, the item must be thoroughly dried—preferably using compressed air and a drying cabinet—to avoid corrosion or electrical shorts.
Homemade vs Professional Solutions: What’s Actually in Your Control?
At some point, everyone who owns an ultrasonic cleaner asks the same question: “Can I just make my own cleaning solution?” It’s an appealing idea—homemade usually means cheaper, more accessible, and sometimes even safer-sounding. But when it comes to ultrasonic cleaning, things aren’t so straightforward.
The Allure of DIY: Vinegar, Dish Soap, and Baking Soda
Let’s start with the common DIY recipes. Dish soap and water. White vinegar and baking soda. A splash of ammonia, maybe. These household mixtures can, in some cases, be effective—especially if you’re cleaning simple items like stainless-steel cutlery or glass jars. But they’re far from universal.
Vinegar, for instance, is acidic. That’s great for dissolving mineral scale and limescale—but it’s corrosive to many metals and can damage plated surfaces, especially if left soaking. Dish soap, unless extremely diluted, produces foam, which dampens cavitation. Baking soda, while safe on some surfaces, may leave a residue unless rinsed thoroughly. None of these are ideal in precision applications.
The bigger issue? Inconsistent results. Homemade mixtures lack the precise chemistry that professional cleaning agents are engineered for. That means you’re gambling with the effectiveness of your ultrasonic process—and worse, with the safety of your items.
The Case for Professional Formulas
Professionally developed ultrasonic cleaning solutions are optimized for cavitation dynamics. They’re made to reduce surface tension without excessive foaming, maintain pH levels that won’t harm materials, and lift specific types of contaminants—like flux, oil, biological residue, or oxide buildup.
You’ll also find that commercial solutions come with certifications. Many are biodegradable, non-toxic, or compliant with ISO standards—particularly important if you’re cleaning in a medical or laboratory setting.
And perhaps most importantly, they’re predictable. You know how long to soak, at what temperature to run the bath, and how often to change the solution. That’s peace of mind no vinegar-and-baking-soda mix can offer.
Safety First: Know Your Limits Before You Clean
Even the most “gentle” ultrasonic cleaner can damage items if misused. And the cleaning solution? It plays a starring role in both safety and success. Here’s what to consider before you hit the power button.
Material Sensitivity
Always double-check what your object is made of. Natural stones like opals, amber, and pearls should never go into an ultrasonic cleaner—regardless of the solution. The same goes for painted surfaces, glued settings, and items with microcracks or hairline fractures.
When in doubt, consult the manufacturer’s recommendations. For example, most fine jewelry brands explicitly state whether their pieces are ultrasonic-safe, and they often specify compatible solution types. Disregarding this could void warranties or cause irreversible damage.
Proper Dilution and Disposal
Even a great cleaner can become dangerous if used incorrectly. Concentrated formulas should always be diluted according to the manufacturer’s instructions. Over-concentration can lead to overly aggressive cavitation, which risks etching or pitting delicate surfaces.
Just as important: disposal. Never pour used ultrasonic solution—especially one with oil, heavy metals, or solvents—down the drain. Check local regulations, and treat used solution as hazardous waste when necessary.
Ultrasonic Cleaning Agents
Storage and Ventilation
Keep ultrasonic solutions out of reach of children and store them in a cool, dry place. Some chemicals release vapors during ultrasonic agitation—particularly at higher temperatures—so use your cleaner in a well-ventilated area or under a fume hood if working in a lab or clinic.
What Solution to Use—Based on What You’re Cleaning
Ultrasonic cleaners are used across an impressive spectrum—from cleaning dental instruments to reviving old carburetors. But not every cleaning job requires the same solution. Here’s how to think about what’s best for your specific use.
For Jewelry
If you’re cleaning gold, platinum, or diamonds, a mild ammonia-based solution or a professional jewelry cleaning fluid is ideal. These solutions are specially formulated to lift skin oils, soap residue, and polish buildup without harming the metal or stone. However, if you’re cleaning softer gemstones like turquoise or organic materials like coral, avoid ultrasonic cleaning altogether—no solution can make that safe.
For Eyeglasses and Optical Lenses
Use an alcohol-free, ammonia-free formula, preferably one designed for optical use. These are non-streaking and safe for anti-reflective coatings. Using standard household cleaners can degrade lens coatings over time.
For Dental and Medical Instruments
Only use enzymatic or non-ionic surfactant-based solutions that are designed for surgical-grade cleanliness. These are typically biodegradable and neutral pH, and they’re formulated to remove protein residue, blood, and biofilm without damaging stainless steel or composite surfaces.
For Retainers, Aligners, and Mouthguards
Mild enzymatic or alkaline cleaners with antimicrobial action are best. Avoid anything too aggressive—like vinegar or peroxide—which can degrade plastics and leave harmful residues. Many manufacturers recommend specific cleaners that are also safe for oral use, which is important because trace residues may remain even after rinsing.
For Automotive Parts and Tools
Heavy-duty degreasing solutions are commonly used here—these typically contain a combination of alkalis, surfactants, and chelating agents. Some may be caustic, so protective gloves and proper ventilation are a must. These formulas excel at removing carbon buildup, metal shavings, and oil residues.
For Electronics (When Applicable)
Yes, some circuit boards and electronic components can be cleaned ultrasonically, but only with distilled water and an electronics-safe surfactant. And they must be thoroughly dried—preferably in a vacuum chamber or with isopropyl alcohol to displace water—before powering up again.
Professional Insights and Best Practices
Ultrasonic technology has evolved to a point where the solution used can make or break the result. Industry experts emphasize not just the formula, but the process surrounding it.
According to a study from the Journal of Materials Processing Technology, the synergy between ultrasonic frequency and chemical composition determines how effectively particles detach from surfaces (Jin et al., 2020). Too harsh a chemical might clean quickly—but also damage the surface. Too mild, and it might just agitate dirt rather than remove it.
Laboratories that routinely use ultrasonic cleaning follow strict SOPs—Standard Operating Procedures—which include pre-rinse, cleaning, and post-rinse phases. They use solutions that are certified for specific residue types, and they document temperature, time, and concentration for repeatability.
The same principle can be adapted for personal or small-business use: use the right solution, change it regularly, rinse thoroughly, and keep notes of what works best for your items.
Final Thoughts: Your Cleaning Solution is Your Success Formula
So—what solution should you use in your ultrasonic cleaner? It depends. But that’s not a cop-out—it’s a reflection of how nuanced ultrasonic cleaning really is.
The safest path is to match your solution to your material. That means reading labels, researching your cleaner’s compatibility, and understanding what kind of dirt or contamination you’re removing. Skip the guesswork. Use distilled water as your base when in doubt, and lean toward professionally developed solutions when cleaning high-value or delicate items.
Remember: ultrasonic cleaning is about precision. And like any precise tool, the results depend not only on the machine—but on how thoughtfully you use it.


