


Keeping Your Ultrasonic Cleaner Truly Clean
Browse Volume:91 Classify:Support
Owning an ultrasonic cleaner can feel like you’ve unlocked a hidden power in your workshop or lab. It’s efficient, hands-free, and seemingly magical in how it makes grime vanish from delicate parts and intricate crevices. But here’s the thing most users overlook: while your machine is busy cleaning everything else, who’s cleaning the machine?
Over time, that miracle bath of ultrasonic waves and cleaning fluid collects more than just dirt from your tools. Residues, oils, metal particles, and even biofilms can accumulate in the tank and internal components, quietly reducing the machine’s effectiveness. If left unchecked, it’s not just cleaning performance that takes a hit—your ultrasonic cleaner could suffer damage or pose hygiene risks, especially in sensitive applications like dental, medical, or electronics cleaning.
So, how do you clean the very machine that’s meant to clean everything else? The answer is more layered than you might think.
Why Regular Cleaning Matters More Than You Think
Many people assume that replacing the solution is enough. It’s not. Think of it like washing dishes in dirty water—it might look like you’re cleaning, but the results are questionable. Residue buildup on the tank walls can dampen cavitation. Hidden biofilms in filters or drains may harbor bacteria. Worst case? That faint brown ring or oily film you keep noticing could actually be corrosive to the stainless-steel surface.
Consistent cleaning doesn’t just prolong the machine’s life—it protects your cleaning results and, depending on the application, might even be a matter of compliance. In medical and laboratory environments, for instance, poorly maintained ultrasonic cleaners can violate hygiene standards and lead to cross-contamination. The stakes are higher than they seem.

Experimenting in the lab
Step-by-Step: A Deeper Way to Clean Your Ultrasonic Cleaner
The good news is, cleaning your cleaner doesn’t require exotic tools or harsh chemicals—just attention and consistency. First, always start by powering off the machine and unplugging it. Safety first.
Drain the cleaning solution completely. Don’t reuse it, especially if it has visible particles or discoloration. Rinse the tank with warm water and use a soft cloth or sponge with a neutral pH detergent to wipe down the inner surfaces. Avoid anything abrasive. Even a fine scrub pad can scratch stainless steel and invite future corrosion.
Next, check the transducers and heating elements (if accessible) for residue buildup. These areas are critical to ultrasonic performance and often neglected. For machines with external filters, tubing, or overflow drains, clean and flush these parts with distilled water. Some systems come with self-cleaning cycles—if yours does, use it, but don’t treat it as a replacement for physical cleaning.
Finally, run a test cycle with fresh distilled water and no load. This lets you inspect cavitation clarity and ensures no detergent or debris is left behind.

distilled water
What Cleaning Agents Are Safe (and Which to Avoid)
Ultrasonic cleaning tanks are typically made of stainless steel—usually 304 or 316L. This gives some flexibility in cleaning agents, but not carte blanche. Avoid chlorine-based bleaches or acids like hydrochloric or sulfuric acid. These are corrosive and can damage both the tank and internal components. For most maintenance routines, a mild alkaline detergent or a neutral pH enzymatic cleaner is more than sufficient.
If biofilm or bacterial concerns are present—as in dental, tattoo, or surgical environments—use a medical-grade disinfectant recommended for stainless steel. Just be sure to rinse thoroughly afterward. Never leave harsh chemicals standing in the tank overnight.
For hard water users, descaling might also be necessary every few months. Limescale can gradually form along heating elements or tank corners. Use a descaling agent designed for lab or food-grade equipment, and rinse thoroughly.
How Often Should You Clean the Ultrasonic Cleaning System?
Frequency depends entirely on usage. In a high-volume lab or industrial setting, daily cleaning might be necessary. If you’re using the cleaner occasionally for jewelry or lenses at home, a weekly routine is likely enough. The key is recognizing that even invisible residues impact performance.
Watch for subtle signs: cloudiness in the solution, slower cleaning cycles, or strange odors all hint at overdue maintenance. Make it a habit to inspect the tank after each use. Just like brushing your teeth—if you wait until something smells off, it’s already too late.

Industrial Environment
When Deep Cleaning Isn’t Enough: Servicing and Professional Help
If your ultrasonic cleaner has internal pumps, multi-stage filtration, or integrated drying functions, it may eventually require servicing beyond surface cleaning. Pumps can get clogged, sensors may drift, and circuit boards exposed to moisture can degrade over time.
Professional maintenance once a year isn’t overkill—it’s preservation. Especially for users in regulated industries, preventive servicing can be the difference between consistent output and costly downtime.
And if cleaning feels like a chore, it may be time to consider a more advanced unit that supports easier maintenance. Some brands—like Granboultrasonic—design their industrial systems with detachable tanks, self-flushing circuits, and surface coatings that resist residue buildup, making the upkeep part of the design rather than an afterthought.
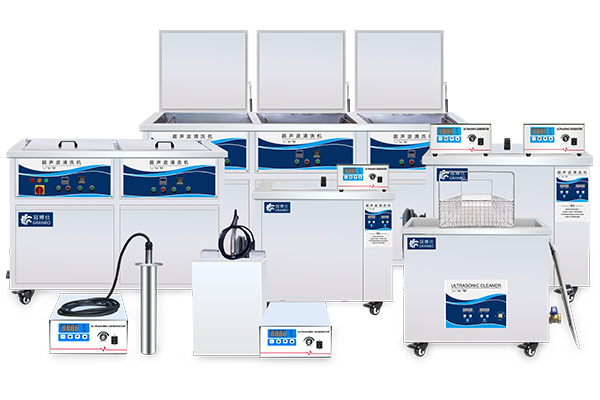
Ultrasonic cleaning machines


