


Proper Hose Cleaning in Ultrasonic Systems: What You Need to Know
Browse Volume:174 Classify:Support
Ultrasonic cleaning systems are admired for their ability to deep-clean the most intricate surfaces—removing dirt, biofilm, and residue that ordinary methods leave behind. But when it comes to the hoses used to transfer solutions in and out of these machines, many users don’t give them the attention they deserve. These flexible tubes often carry heated detergent, drain contaminated fluids, or recirculate cleaning agents—and they’re often the most neglected part of the system.
Have you ever opened the drainage valve of your ultrasonic cleaner only to notice strange odors, discoloration, or a sluggish flow? That’s your hose trying to get your attention. Just like the tank and the transducers, hoses can accumulate microbial buildup, sediment, or chemical residue over time. And in environments like dental clinics, labs, or manufacturing floors, that can compromise the entire cleaning cycle.
So, how do we clean the hose of an ultrasonic cleaning system properly—without damaging the hose, disrupting operations, or compromising hygiene? The answer lies in combining thoughtful technique, compatible chemistry, and routine checks.
Why Hose Cleaning Isn’t Optional in Ultrasonic Systems
At first glance, hoses may seem like passive components—just channels for liquid to pass through. But they play a critical role in maintaining the integrity of the cleaning process. Contaminated or clogged hoses can reintroduce particles into a clean tank, slow down drainage, or worse, create an environment for bacterial growth if not regularly cleaned.
This is especially crucial when cleaning sensitive equipment—like dental instruments, surgical tools, or precision optics—where even microscopic contamination can pose a risk. If your system is recirculating the same fluid through a dirty hose, all the ultrasonic cavitation in the world won’t compensate.
Furthermore, many modern systems use transparent or semi-clear tubing. If you start to see cloudiness, biofilm streaks, or sediment clinging to the inner wall, that’s a clear visual cue it’s time for a proper cleaning.
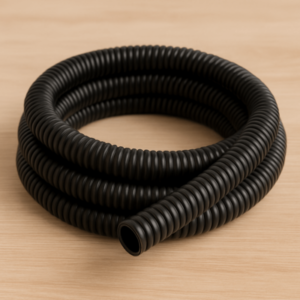
Hoses
Preparing the Hose for Cleaning: Disassembly and Safety
Before you even think of flushing or soaking, it’s essential to safely disconnect the hose. Turn off and unplug the ultrasonic cleaner completely. If the hose has been in use with heated solutions or chemicals, let everything cool to room temperature. This protects not only your hands but the material of the hose itself, which may degrade faster when handled warm.
Next, remove the hose carefully from its connection points. Depending on the model, it may be clamped, screwed in, or fitted with quick-release valves. If your system uses clamps, make sure to use a proper tool to avoid tearing or weakening the connector. Mark the ends if the hose is direction-sensitive or tied into a filtered loop.
Before introducing any cleaning fluid, visually inspect the hose for cracks, hardness, or signs of degradation. If the material feels brittle or shows signs of chemical corrosion, it’s better to replace than to clean it. Hoses don’t last forever, and trying to save a damaged one often leads to system leaks or contamination.
Effective Cleaning Methods: Flushing, Soaking, and Ultrasonic Assistance
Once removed, the hose can be cleaned using a multi-step process:
Flushing with warm distilled water.
Start with a thorough internal rinse to remove loose debris. Use a small peristaltic pump or a manual syringe to push clean water through the length of the hose. Avoid using tap water if your application is sensitive—residues from hard water may cling to the interior walls.
Soaking in compatible detergent solution.
Use a neutral-pH or mildly alkaline ultrasonic cleaning detergent diluted with water according to manufacturer instructions. Place the hose in a container long enough to accommodate it without bending. If the hose is too long, coil it loosely without kinking.
Ultrasonic agitation (optional but effective).
Place the soaking container inside the ultrasonic tank and run a cycle at mid-frequency (around 40 kHz). This method, known as indirect ultrasonic cleaning, ensures that the internal walls of the hose benefit from the cavitation effect without overstressing the hose’s exterior. Time the process for 10–15 minutes.
Final rinse and air dry.
After soaking, flush the hose again with distilled water until there is no detergent residue. Then hang it vertically or drape it over a drying rack to air dry completely. Compressed air can be used to speed up the drying process, especially if the hose has a narrow diameter.
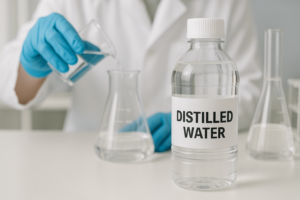
distilled water
Choosing the Right Cleaning Solution for Hose Material
Not all hoses are made alike. Depending on the manufacturer, your ultrasonic system’s hose could be made of silicone, PVC, EPDM, or TPE. Using the wrong cleaner could cause the material to swell, stiffen, or degrade.
Here are general guidelines:
For silicone hoses, avoid alcohol-based or highly acidic cleaners.
For PVC hoses, steer clear of strong alkaline agents or anything above pH 10.
EPDM hoses are more chemical-resistant but should still avoid oxidizing agents like hydrogen peroxide.
If you’re unsure, check the hose specification or reach out to the system provider.
In all cases, it’s best to stick to medical or lab-grade detergents formulated for plastics or tubing. These are typically free-rinsing, non-corrosive, and non-residual, which makes them perfect for hoses used in fluid handling.
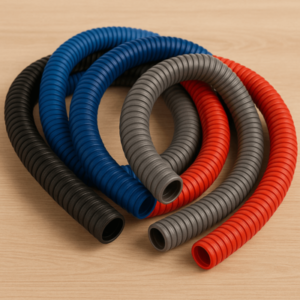
Hoses
Preventive Maintenance: Keeping the Hose Clean in the Long Run
Cleaning the hose shouldn’t be a crisis event—it should be part of your weekly or bi-weekly maintenance schedule. After each use, consider flushing the hose with clean distilled water, especially if the solution was heavily soiled. If your system runs automated fluid cycles, incorporate a brief rinse stage to prevent residue buildup.
Label hoses with the date of last cleaning or use a color-coded system to track usage intervals. For high-throughput settings like labs or dental clinics, rotating between two sets of hoses can extend longevity and reduce cross-contamination risks.
Finally, if your ultrasonic cleaner includes an integrated hose flushing or filter-backwash feature, take advantage of it—but don’t rely on it as a replacement for hands-on care.


