


Troubleshooting Guide: Common Faults in Ultrasonic Cleaning Machines and How to Fix Them
Browse Volume:52 Classify:Support
Ultrasonic cleaning technology has revolutionized industrial and commercial cleaning processes across multiple sectors, from jewelry shops to medical facilities. However, like any sophisticated equipment, these machines can develop various operational issues that compromise their effectiveness. Understanding the most frequent malfunctions and their root causes helps operators maintain consistent performance and avoid costly downtime.
Understanding How Ultrasonic Cleaners Work
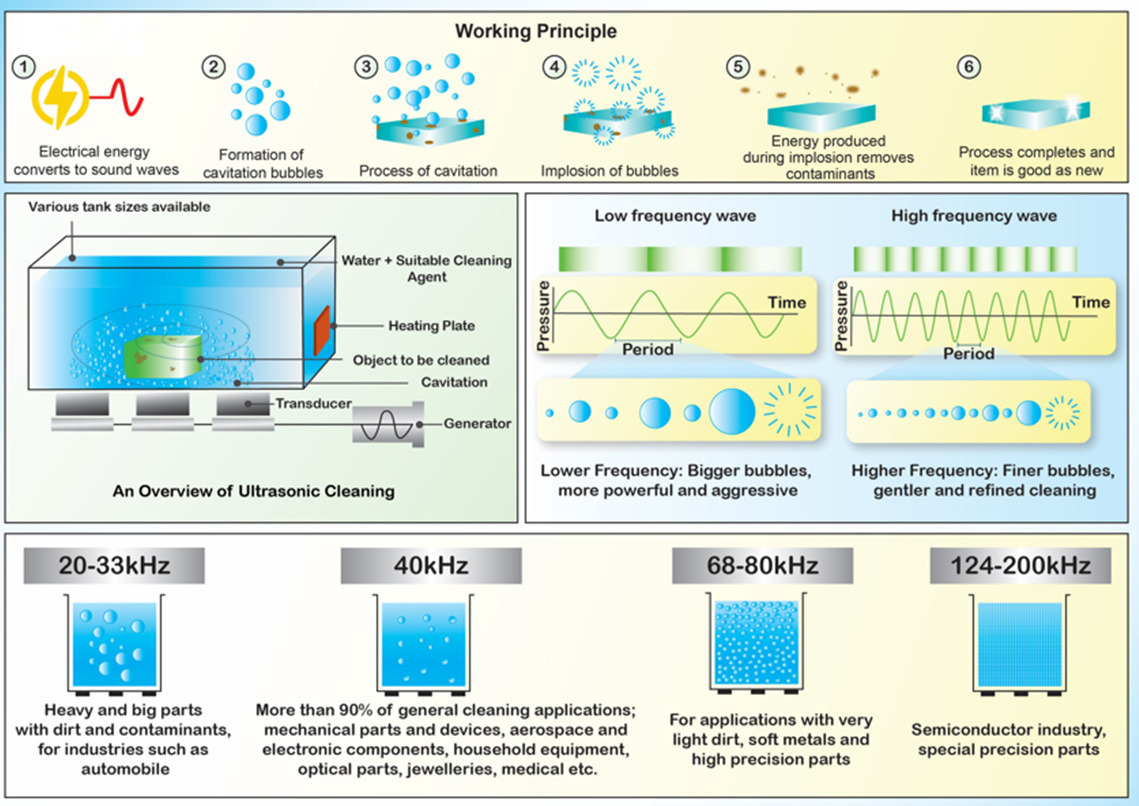
Before diving into specific faults, it’s essential to grasp the basic operating principles of these machines. Ultrasonic cleaners generate high-frequency sound waves that create microscopic bubbles in the cleaning solution. This process, called cavitation, produces intense scrubbing action that removes contaminants from surfaces without physical contact.
The Science Behind Cavitation
The ultrasonic transducers convert electrical energy into mechanical vibrations, typically operating between 25 kHz and 40 kHz for most commercial applications. These vibrations travel through the liquid medium, creating alternating high-pressure and low-pressure cycles. During low-pressure phases, tiny vacuum bubbles form and then violently collapse during high-pressure phases. This implosion generates localized temperatures exceeding 5,000 degrees Celsius and pressures above 10,000 psi, though only for microseconds.
The cleaning effectiveness depends entirely on maintaining proper cavitation intensity throughout the tank. When components fail or settings drift from optimal parameters, the cavitation weakens or stops completely. This is why many faults manifest as reduced cleaning performance rather than total equipment failure.

Ultrasonic cleaner working principle diagram
Key Components of an Ultrasonic System
Every ultrasonic cleaner consists of several interdependent systems. The generator supplies electrical power at the correct frequency and amplitude. Transducers, bonded to the tank bottom or sides, convert this electrical energy into mechanical vibrations. The tank holds the cleaning solution and items being cleaned. Temperature controls maintain optimal solution conditions. Finally, timers and control circuits manage the cleaning cycles.
Failures in any single component can affect the entire system’s performance. A malfunctioning generator might provide insufficient power to the transducers. Damaged transducers cannot create adequate vibrations. Leaking tanks lose solution volume, reducing cavitation efficiency. Understanding these relationships helps diagnose problems more accurately.

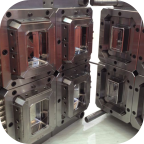
Internal structure comparison diagram of ultrasonic cleaners
No Cleaning Action or Poor Performance
The most frustrating fault is when the machine runs but produces little or no cleaning effect. Objects emerge from the tank still dirty, despite completing full cleaning cycles. This symptom has several potential causes that require systematic investigation.
Failures and Detection Methods
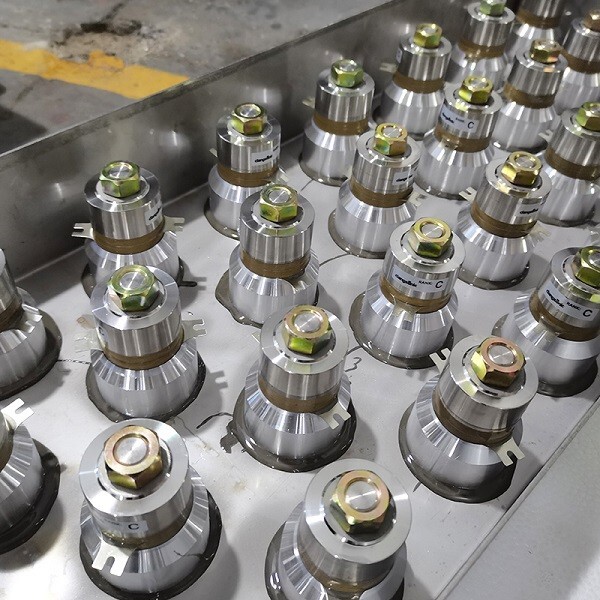
Powerful ultrasonic transducer
Transducers are the workhorses of ultrasonic cleaning systems and also the most vulnerable components. They fail due to thermal stress, mechanical shock, or simple age-related degradation. A single failed transducer in a multi-transducer array can significantly reduce cleaning effectiveness.
Testing transducers requires a simple technique I’ve used countless times in the field. Fill the tank with water to normal operating level, then run the machine at full power. Carefully lower a piece of aluminum foil vertically into the solution while the unit operates. Active cavitation will quickly perforate the foil in areas above functioning transducers. Sections that remain intact after 30 seconds indicate dead or weak transducers beneath them.
Another diagnostic method involves the finger test, though this requires caution. With the machine running, briefly touch the tank exterior at various points. You should feel strong, uniform vibrations across the entire surface. Dead spots or areas with noticeably weaker vibration indicate transducer problems in those locations.
Generator Malfunction Symptoms
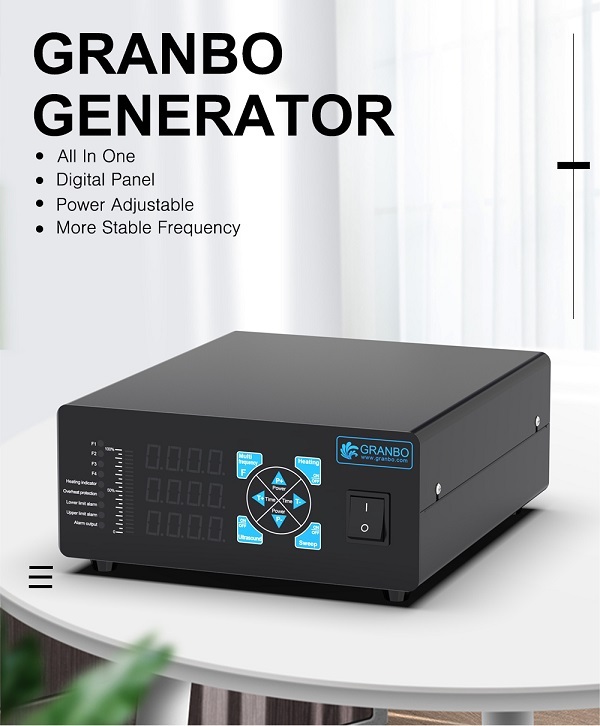
Ultrasonic Generator 02 Black
The ultrasonic generator converts standard AC power into high-frequency electrical oscillations that drive the transducers. Modern generators use sophisticated electronics with multiple failure modes. Power supply issues, failed capacitors, or damaged oscillator circuits all produce similar symptoms of weak or absent cleaning action.
Generator problems often announce themselves through unusual behavior. The power indicator might illuminate, but the unit produces no ultrasonic output. Alternatively, output might fluctuate randomly during operation. Some generators include diagnostic LEDs or displays that show fault codes, but many older units lack these features.
Testing generator output requires specialized equipment like oscilloscopes or ultrasonic power meters. However, a practical field test involves monitoring the tank temperature during operation. A functioning generator transfers significant energy into the solution, causing noticeable temperature rise within 10 to 15 minutes. If the solution remains cool despite the machine running, the generator likely isn’t producing adequate output.
Incorrect Frequency Settings
Some industrial ultrasonic cleaners offer adjustable frequency settings to optimize performance for different applications. Lower frequencies around 25 kHz provide more aggressive cleaning with larger cavitation bubbles, suitable for removing heavy contamination. Higher frequencies near 40 kHz generate smaller bubbles for gentler cleaning of delicate items.
Mismatched frequency settings represent a common operator error that mimics equipment failure. Running a 40 kHz machine at 25 kHz, or vice versa, produces weak cavitation and poor cleaning results. The transducers cannot operate efficiently outside their designed frequency range.
Always verify that frequency settings match both the transducer specifications and the cleaning application requirements. Most machines have fixed frequencies, eliminating this variable. But for adjustable units, check the frequency selector switch or digital control panel before assuming component failure.
Ultrasonic Frequency Select Guide
Unusual Noises During Operation
Ultrasonic cleaners do produce audible sound despite operating above the human hearing range. Normal operation generates a steady humming or buzzing tone. However, abnormal noises like grinding, rattling, or high-pitched squeals indicate specific problems requiring immediate attention.
Grinding and Rattling Sounds
Mechanical grinding or rattling noises typically originate from loose components or foreign objects in the tank. Transducers can detach partially from the tank surface due to adhesive degradation or thermal cycling. This creates a gap that allows the transducer to vibrate freely, producing loud rattling sounds.
Inspect the tank exterior thoroughly if grinding noises develop. Look for any loose mounting brackets, screws, or external components that might vibrate against the tank. Check that the tank itself sits securely in its housing without excessive play. Sometimes the solution basket or fixtures inside the tank come loose and rattle against the walls during operation.
Foreign objects trapped between the tank and its mounting frame cause similar symptoms. Small parts, fasteners, or debris can work their way into these spaces during cleaning operations. Shutting down the machine and carefully inspecting all accessible areas usually reveals the culprit.
High-Pitched Squealing Issues
A piercing squeal or whistle during operation suggests electrical problems rather than mechanical issues. This sound often indicates that the generator’s operating frequency has drifted from its designed value, a condition called detuning. Aging capacitors, damaged inductors, or failing transistors in the generator circuit cause frequency shifts.
Detuning reduces cleaning efficiency because the generator no longer matches the transducers’ resonant frequency. The mismatch creates reflected power that can damage the generator further. Additionally, operating off-frequency often produces audible harmonics within the human hearing range, manifesting as annoying squeals or whistles.
Some squealing results from air bubbles trapped between transducers and the tank surface. This happens when transducers partially debond due to inadequate adhesive or thermal stress. The trapped air prevents efficient energy transfer and creates acoustic feedback loops that produce whistling sounds.
Overheating Problems
Temperature regulation is critical for ultrasonic cleaning effectiveness and equipment longevity. Most cleaning solutions work best between 50 and 65 degrees Celsius. Excessive heat degrades cleaning chemistry, damages delicate parts, and stresses electrical components. Conversely, insufficient heating reduces cleaning efficiency.
Thermostat Malfunctions
The thermostat controls heating element operation to maintain the selected solution temperature. Failed thermostats either stick in the on position, causing continuous heating, or fail open, preventing any heating. Stuck-on thermostats are particularly dangerous as they can boil the solution dry if unattended.
Testing a thermostat requires monitoring both solution temperature and heating element activation. If the solution temperature exceeds the setpoint but the heater continues running, the thermostat has failed closed. If temperature never reaches the setpoint despite the heater activating, either the heater itself is undersized or the thermostat is reading incorrectly.
I’ve seen numerous cases where thermostat sensors become coated with mineral deposits from hard water. This insulation layer causes the sensor to read artificially low temperatures, keeping the heater running continuously. Regular descaling of the tank and temperature sensor prevents this problem.
Inadequate Ventilation
Ultrasonic generators produce substantial heat during operation, especially industrial units running continuously. Inadequate ventilation causes electronics to overheat, leading to thermal shutdowns or permanent component damage. Most machines include cooling fans, but blocked vents or failed fans compromise cooling capacity.
Check that all ventilation openings remain clear of dust, debris, and obstructions. Ensure adequate clearance around the unit for air circulation. Listen for fan operation when the machine runs, as failed cooling fans often go unnoticed until overheating occurs. Accumulated dust inside the electronics compartment acts as thermal insulation, worsening heat buildup.
Industrial environments with high ambient temperatures may exceed the equipment’s cooling capacity. Some machines include thermal overload protection that shuts down operation when internal temperatures exceed safe limits. If the unit repeatedly cycles on and off during hot weather, inadequate cooling is likely the cause.
Extended Operating Cycles
Running ultrasonic cleaners for excessively long periods without breaks can cause overheating even in properly functioning units. The continuous operation generates cumulative heat in both the solution and the electronics. Manufacturers typically specify maximum continuous run times, often 6 to 8 hours for industrial equipment.
Implementing proper duty cycles prevents heat-related failures. Allow the machine to cool periodically during heavy use. Some operations require continuous processing, which necessitates machines specifically rated for that service level. Using a standard intermittent-duty cleaner in a continuous application guarantees premature failure.
Electrical Issues and Power Failures
Electrical problems range from simple blown fuses to complex circuit board failures. These issues prevent the machine from operating entirely or cause erratic behavior during use. Systematic troubleshooting identifies the fault location quickly.
Circuit Breaker Trips
Repeated circuit breaker trips indicate excessive current draw or ground faults. Shorted heating elements, failed generator components, or degraded insulation all cause overcurrent conditions. The circuit breaker protects the wiring and prevents fires, so never bypass or upsize it without addressing the underlying problem.
Begin troubleshooting by isolating individual circuits. Most ultrasonic cleaners have separate circuits for the generator, heater, and controls. Disconnect components sequentially to identify which one triggers the breaker. A process of elimination narrows down the faulty subsystem.
Ground faults occur when electrical current finds an unintended path to earth ground. Water infiltration into electrical compartments frequently causes this condition. Moisture can enter through damaged seals, condensation, or spillage. Thoroughly inspect all electrical enclosures for signs of water damage, corrosion, or humidity.
Inconsistent Power Supply
Unstable input voltage causes numerous operational problems. Voltage sags, spikes, or fluctuations stress electronic components and reduce their lifespan. Generators are particularly sensitive to power quality issues. Symptoms include flickering displays, random shutdowns, or erratic cleaning performance.
Measure the incoming power supply with a voltmeter during machine operation. Voltage should remain within plus or minus 10 percent of the rated value. Significant deviations indicate problems with the facility’s electrical system. Shared circuits with heavy loads like motors or welders cause voltage drops when those loads activate.
Installing a dedicated circuit with appropriate capacity solves many power quality issues. Industrial facilities might require voltage regulators or uninterruptible power supplies for sensitive equipment. The investment in proper electrical infrastructure prevents repeated equipment failures and downtime.
Faulty Wiring Connections
Loose or corroded electrical connections create high-resistance junctions that generate heat and cause intermittent failures. These problems worsen gradually as the poor connection degrades further. Symptoms include random shutdowns, flickering indicators, or burning odors.
Periodic inspection of all wiring connections should be part of regular maintenance. Look for discolored wires, melted insulation, or loose terminal screws. Tighten all connections to manufacturer specifications. Apply dielectric grease to outdoor or high-humidity installations to prevent corrosion.
Pay special attention to connections between the generator and transducers. These carry high-frequency, high-power signals that stress connectors severely. Oxidation or looseness in these connections dramatically reduces ultrasonic output. Clean and secure these terminals annually at minimum.
Tank and Fluid Related Problems
The cleaning tank and solution directly affect performance even when the ultrasonic system functions perfectly. Tank damage, leaks, or solution chemistry problems mimic electronic failures but require completely different solutions.
Leaking Tanks and Seal Deterioration
Tank leaks range from slow seepage to catastrophic failures. Stainless steel tanks develop pinholes from corrosion or physical damage. Welded seams can crack from thermal cycling or mechanical stress. Drain valves and pipe fittings deteriorate over time, allowing solution to escape.
Small leaks often go unnoticed initially. The solution level drops gradually, requiring frequent refilling. Stains or mineral deposits around the tank base indicate chronic leakage. Severe leaks produce obvious puddles and require immediate shutdown to prevent electrical hazards.
Repairing tank leaks depends on their location and severity. Welded repairs work for stainless steel construction but require professional welders familiar with thin-gauge material. Epoxy patches provide temporary fixes for small pinholes. Drain valve and fitting leaks usually need complete component replacement, as seals and threads wear beyond effective repair.
Improper Solution Levels
Ultrasonic cleaning requires sufficient solution depth to fully immerse the transducers and create effective cavitation. Insufficient liquid level exposes transducers to air, causing overheating and rapid failure. The transducers convert electrical energy into heat rather than ultrasonic vibrations when not properly coupled to liquid.
Most tanks include fill level markings indicating minimum and maximum solution volumes. Operating below the minimum level risks transducer damage. Excessive fill above the maximum reduces cleaning effectiveness and may cause spillage during operation. The cavitation intensity diminishes as distance from the transducers increases.
Monitor solution levels throughout extended cleaning operations. Evaporation and dragout on cleaned parts gradually reduce volume. Top off the tank as needed to maintain proper levels. Some industrial systems include automatic level controls that add solution when needed, but these require functional sensors and fill valves.
Contaminated Cleaning Fluids
Cleaning solution degrades over time as it accumulates removed contaminants. Eventually the solution becomes saturated with oils, particles, and dissolved materials. This reduces cleaning effectiveness and can damage the tank or components. Visual inspection reveals when solution replacement is necessary.
Fresh solution appears clear or has consistent color depending on the chemistry used. Cloudy, darkened, or foul-smelling solution indicates contamination requiring replacement. Excessive foam during operation suggests dissolved oils or incompatible detergents. Sediment accumulation at the tank bottom reduces ultrasonic transmission and should be removed regularly.
Establish a solution change schedule based on usage intensity. High-volume operations might require daily changes, while occasional users can extend intervals to weekly or monthly. Some operations use filtration systems to extend solution life, but these add complexity and maintenance requirements. The cost of fresh solution is trivial compared to the consequences of inadequate cleaning or equipment damage from contaminated fluids.
Preventive Maintenance Strategies
Proactive maintenance prevents most ultrasonic cleaner failures. Regular inspections identify developing problems before they cause breakdowns. Simple tasks performed consistently dramatically extend equipment life and maintain consistent performance.
Daily Inspection Routines
Operators should perform basic checks at the start of each shift. Verify that solution levels fall within the marked range. Inspect the tank for obvious leaks or damage. Listen for unusual noises during startup. Confirm that heaters and controls respond properly. These quick checks take only minutes but catch many problems early.
During operation, monitor the cleaning results on typical parts. Degraded performance often signals developing problems before complete failure occurs. Document any changes in cleaning time, temperature behavior, or operational sounds. These observations help maintenance staff diagnose intermittent issues.
End-of-shift procedures should include draining the tank if the machine won’t be used for several days. Wipe down all surfaces and remove any spilled solution. Check that drain valves close completely. These simple steps prevent corrosion and contamination issues.
Scheduled Component Replacement
Certain components have predictable service lives that warrant replacement on a schedule rather than waiting for failure. Transducers typically last 3 to 5 years in continuous industrial service. Generator capacitors degrade over time, particularly in high-temperature environments. Heating elements eventually fail from thermal cycling and mineral buildup.
Manufacturers provide recommended replacement intervals for consumable components. Following these guidelines prevents unexpected downtime. Replacing transducers before complete failure maintains consistent cleaning performance. Installing new capacitors every few years keeps generator output stable.
Keep an inventory of critical spare parts for immediate replacement when failures occur. At minimum, stock spare fuses, heating elements, and common seals. Industrial operations should maintain spare transducers and generator circuit boards for rapid restoration of service. The carrying cost of spare parts inventory is negligible compared to production losses from extended downtime.
Professional Servicing Intervals
While operators can handle basic maintenance, professional technicians should inspect the equipment annually. Comprehensive service includes testing transducer output uniformly, measuring generator frequency accuracy, calibrating temperature controls, and inspecting electrical connections. Professional service equipment identifies issues invisible to routine inspections.
Technicians can perform tasks beyond operator capabilities, like retorquing transducer mounting bolts, testing insulation resistance, or updating control software. They verify that safety interlocks function properly and that grounding connections remain intact. Documentation from professional service provides a history for tracking equipment condition over time.
Budget for professional service as part of operational costs. The expense prevents larger repair bills and maintains warranty coverage. Manufacturers often require documented professional service to honor warranty claims. The investment in regular service pays for itself through extended equipment life and reduced failure rates.
When to Repair vs Replace
Eventually every ultrasonic cleaner reaches the end of its economical service life. Deciding whether to repair or replace requires evaluating several factors beyond simple repair costs.
Consider the machine’s age and overall condition. Units over 10 years old may have obsolete components that are difficult or impossible to source. Even if repairs are feasible, additional failures are likely in the near future. Cumulative repair costs often exceed the price of new equipment.
Compare repair estimates against replacement costs. If repairs approach 50 percent of new equipment cost, replacement makes more financial sense. Factor in improved efficiency and features of modern units. Newer models often consume less energy, clean more effectively, and include better controls than older machines.
Evaluate downtime costs when making repair decisions. Expedited repairs or temporary rentals may cost more than the repair itself. If the machine is critical to production, maintaining a spare unit or choosing rapid replacement over extended repair periods makes business sense. Lost production often outweighs equipment costs.
After decades working with ultrasonic cleaning systems, I’ve learned that most failures result from inadequate maintenance rather than inherent design flaws. Machines that receive proper care and regular attention provide years of reliable service. Understanding common faults and their causes empowers operators and maintenance staff to keep equipment running efficiently. The key is addressing small problems promptly before they cascade into major failures requiring extensive downtime and expensive repairs.
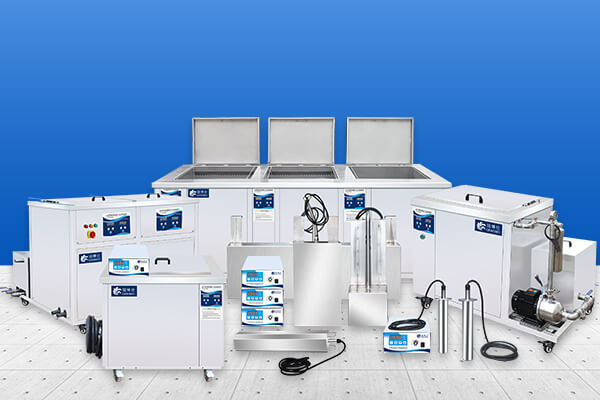
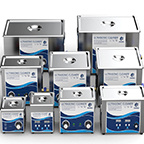
Granbo ultrasonic cleaning machines


